
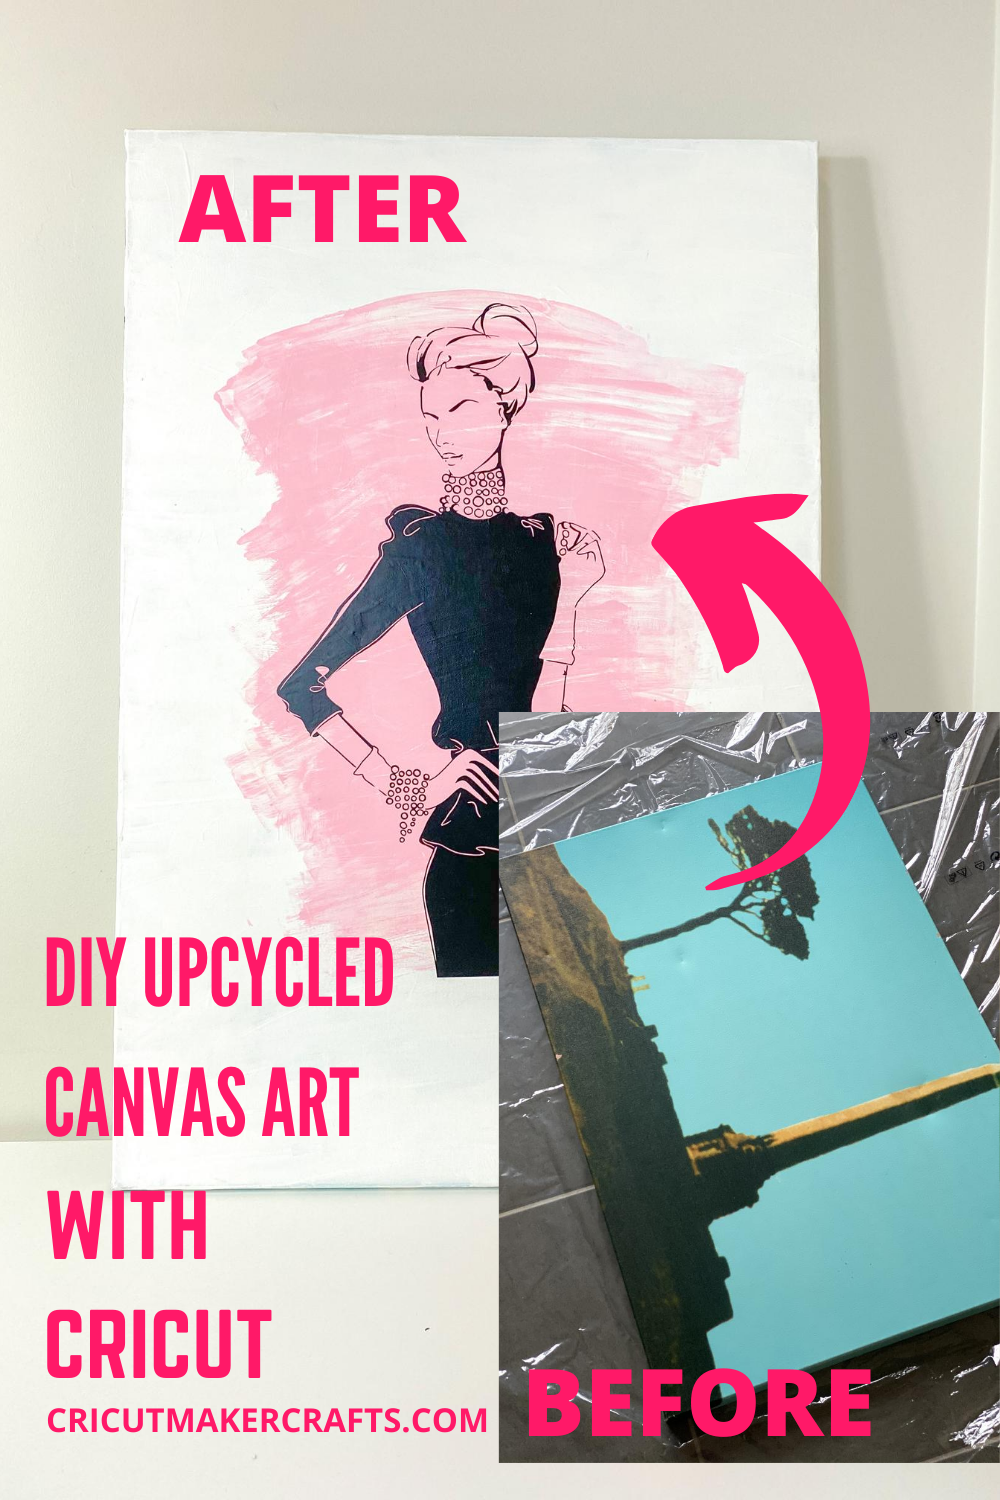
In this post, I’m sharing how I repurpose old canvas art that I got from a thrift store for just $5 into one of a kind statement piece with just some paint and my magical Cricut Maker!
AFFILIATE DISCLOSURE: Cut N Make Crafts is a participant in the Amazon Services LLC Associates Program, an affiliate advertising program designed to provide a means for sites to earn advertising fees by advertising and linking to Amazon.com.
Hello, Cricut buddies! I’m Jav from Cut N Make Crafts (not affiliated with Cricut). Today’s project is all about upcycling/repurposing old canvas art into one-of-a-kind statement fashion art that no one would believe was made by you. I’m creating this canvas art for my living room which is super girly. It’s not complete yet so I don’t have the actual photos of the wall art in the living room.
Supplies Needed to Repurpose Old Canvas Art
- Old Canvas Art (I bought mine from a thrift store for $5)
- Cricut Maker/Explore
- Cricut EasyPress
- Iron-on vinyl (I used Siser iron-on vinyl for this project instead of the adhesive vinyl because adhesive vinyl does not stick properly and keeps coming off. I experienced this when I did my first vinyl and canvas project: How to Make Rolled Paper Flowers and Vinyl Decal Canvas Art)
- Gesso (used as a base coat on canvas so that the acrylic paint can stick to it in a better way. I used six coats of gesso on this canvas to ensure there were no black spots left).
Video Tutorial – Repurpose Old Canvas Art
Get the Ultimate Life-Saver Vinyl Guide for Beginners
If you’re new to crafting with vinyl, I highly recommend checking out my Ultimate Life-Saver Vinyl Guide for beginners. It has every single thing you need to know to create perfect vinyl crafts.
The guide contains details on all the different types of vinyl out there and what each of these vinyl are used for. Next, you’ll find tutorials and secrets for cutting, weeding, and applying vinyl correctly and the best part is the list of all the different iron-on heat transfer vinyl by two of the best companies, Cricut and Siser and the ideal settings to use them. Following the settings is the secret to creating beautiful iron-on projects that last forever.
Before I could put any paint on the canvas I had to get rid of this ugly base. The easiest method to do that was to cover the canvas with gesso. Gesso is usually applied to canvases as a base coat so the paint can adhere better.
This was the best solution as gesso is white in color, which saved me from applying an extra coat of white paint.
So, I took a piece of cardboard and covered the canvas with 6 layers of gesso. Yup, 6 layers my friend to ensure there were no black spots left behind.
Surprisingly, gesso dries off real quick so I was able to finish all 6 coats within two days.
Next, came the fun part.
Adding a splash of pretty pink.
Next, I edited the SVG file that I bought from Etsy. It was a digital artwork that was in a PNG format, not AN SVG. If you’re new here and are confused between these terms, please check out my training video on SVGs. It will help you tremendously when you’re working with your Cricut.
Luckily, the size I want fits perfectly on the 12×24” mat so I didn’t have to do any slicing. Since this is an iron-on project I need to turn on mirroring.
I’ll be using iron-on HTV for this project because it sticks better than adhesive vinyl on the canvas.
This iron-on is from Siser and the best way to cut this is with iron-on settings and reduced pressure.
Next, let’s load the mat. I’ve placed my HTV right side down, shiny side down. If you’re new to working with iron-on vinyl, do check out my video where I share a ton of tips for working with iron-on vinyl. It’s an hour-long video with lots of helpful stuff so don’t forget to check it out!
After the cutting was done, I weeded the vinyl. Since the vinyl was black in color and it was extremely difficult to see the cut lines, I rubbed some chalk on it.
So the funny thing is, I accidentally deleted the rest of the videos.
So, I’ll just give you a quick walkthrough of how I applied the design on the canvas.
First, I used the removable fabric marker to mark the placement for the design.
Next, to figure out the right temperature and timing needed for the HTV to stick to the canvas, I referred to my vinyl guide which contains all the details of the different types of vinyl and the exact settings to work with them. When working with iron-on vinyl, it’s extremely important to use the right settings for the temperature, pressure, and timing to ensure the vinyl lasts long.
So here it says 150 degrees centigrade for Siser Easyweed HTV and the pressing time needed is just 15s so I set the temperature and the timer on my EasyPress.
Next, I placed the kraft paper on top of the design and pressed each part for 15 seconds. Kraft paper is extremely important to use as it prevents the material from damage.
Once I had pressed all the sides, I just peeled off the carrier sheet from the top and my beautiful upcycled art was ready!
Enjoyed this Cricut tutorial? Save it for later by clicking the SAVE button on the image below!
More Cricut Vinyl Projects and Posts
Want more Cricut project inspiration? Check out these posts!