• About
    • Cut N Make Crafts Privacy & Disclosure Policy
    • Disclaimer
  • JOIN THE SVG SUPERSTAR WAIT LIST

Jav Sid

SVG Business Coach

  • Home
  • SVG Business Podcast
    • Ep: 1 Why Sell SVG Cut Files
    • Ep 2: From a full-time nurse to an SVG designer – Farren Celeste
    • Ep 3: 400+ Sales in 4 months – Find out the secret to Emma’s success
    • Ep 4: No. 1 Thing You Need to Succeed in SVG Business
  • Designing SVGs
    • 3 COSTLY SVG Mistakes to Avoid – Cricut Crafts
    • 5 Epic Reasons to Create Your Own SVGs
  • Free SVG Files
  • Cricut
    • FREE Beginner’s Cricut Course
    • Cricut Tips
      • Vinyl Tips
        • MUST-HAVE The Ultimate Life-Saver Vinyl Guide for Beginners
        • Different Types of Vinyl and How to Use Them
        • How to use heat transfer vinyl for Cricut
        • How to Keep Iron-on Transfers from Peeling
        • 5 Terrible Iron-on/HTV Mistakes to Avoid – Tips for Iron-on Transfers
        • How to Layer Vinyl in Cricut Design Space
        • 9 UNIQUE Heat Transfer Vinyl Projects to Try
      • Cricut Design Space Help
      • 9 Must-Have Everyday Objects for Cricut Owners
      • Convert Picture to SVG – 3 Quick and Easy Methods
      • Cricut Print and Cut Basics for Beginners + FAQs
      • A Complete Guide to Cricut Blades for Beginners
      • 30+ Cricut Tips for Beginners for the Best Cut
      • Ultimate Beginner’s Guide to Cricut Tools
      • Ultimate Guide to Cricut Mats for Beginners
      • Lesson 1: Cricut Introduction and Set-Up
      • A Beginner’s Guide to Design Space
    • Cricut Crafts for Beginners
      • Birthday Crafts
        • DIY Hand-lettered Cake Topper (Cricut)
      • Cricut Flowers
        • EASY Giant Paper Gerbera Daisy Template FREE SVG
        • DIY Rose Paper Flower Bouquet – FREE SVG for Cricut
        • EASY Crepe Paper Sunflower FREE SVG+TEMPLATE
      • Cricut Felt Projects
        • Cute Felt Frog Craft [Template+SVG Free]
        • Cute DIY Felt Pencil Toppers [FREE SVG]
        • Cute DIY Felt Cloud Wall Hanging [FREE SVG]
      • Cricut Kids Crafts
        • Paper Popsicle Craft [FREE SVG + PDF]
        • Super-Cute Turtle Paper Craft for Kids [FREE SVG+PDF]
        • Paper Plate Fox Cricut Craft for Kids [FREE SVG]
        • Must-Have Supplies for Cricut Beginners
        • How to Write with Cricut: Ultimate Guide
        • FREE Graduation Card SVG File + Intricate Cut Tips + Tutorial
      • Cricut Vinyl Projects
        • 4th of July Mason Jars with Patriotic SVG (FREE)
        • DIY Vinyl Mug Cricut Gift for Teachers
        • How to Make a Custom Tea Towel with Cricut
        • Cricut Mason Jar Labels DIY – FREE SVG
        • DIY Car Ornament-Cricut Maker Wood Project
        • How to Layer Vinyl in Cricut Design Space
      • Fall Crafts
      • Graduation Crafts
      • Home Decor
        • DIY Welcome Tile with Cricut [FREE SVG]
      • Mother’s Day Crafts
        • Free Mother’s Day SVG – Gift Box Tutorial
      • Unicorn Crafts
        • DIY Unicorn Bookmark Using Cricut
        • DIY Unicorn Hair Clips – FREE SVG
        • DIY Unicorn Paper Clips – Beginner Cricut Project
        • How to Make a Unicorn Birthday Banner – FREE SVG
      • Wedding Crafts
        • FREE Wedding Card SVG File + Tutorial
        • Wedding Themed Lantern FREE SVG
  • Cookie Policy (EU)

How to Layer Vinyl in Cricut Design Space

January 27, 2020 by Jav

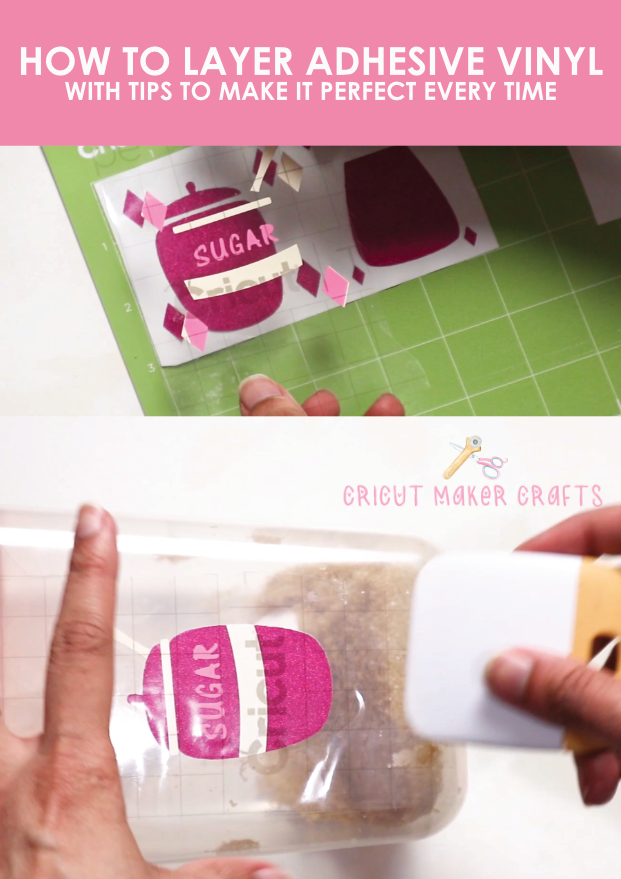
In this post, you’ll learn how to layer vinyl by creating registration marks in Cricut Design Space in 5 simple and easy steps. Also covered in this post: how to make multi-layer vinyl decals and how to assemble a four-layer decal and how to seal vinyl on cups and utensils.

 Guess what happens when you ask your husband to make a cup of tea. 
“Honey, where’s the sugar?”

“Babe, where’s the tea?”

“Honey, where’s the milk?”

And the questions go on and on, until you decide to just get up and do it all by yourself. 

Or you could do something better – LABEL IT ALL! And thanks to Cricut, you can create some super adorable labels for literally anything in your house!

So that’s exactly what I did.

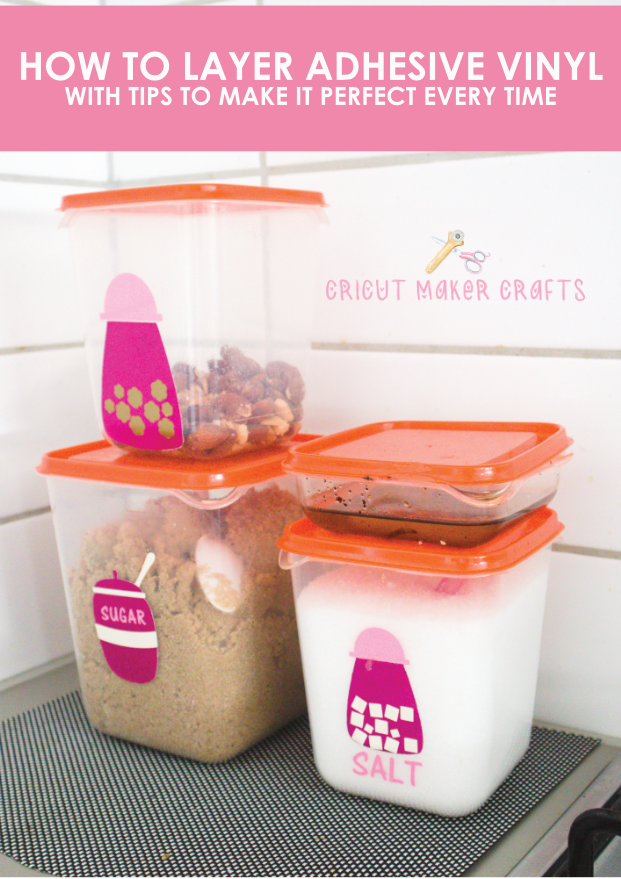
I hand-drew these adorable labels for my kitchen, cut them out using Cricut and added them onto the jars from Ikea. I used Oracal 651 adhesive vinyl and Cricut premium vinyl for this project. I just LOVE how cute they turned out. 

If you would like to make these vinyl labels, scroll down! 

In this post, you'll learn how to layer vinyl by creating registration marks in Cricut Design Space in 5 simple and easy steps. Also covered in this post: how to make multi-layer vinyl decals and how to assemble a four-layer decal and how to seal vinyl on cups and utensils.
How to layer vinyl in Cricut design space

Table of Contents

  • MASTER VINYL CRAFTS WITH THIS E-BOOK
  • DIY Layered Jar Labels with Cricut
    • Supplies Needed
  • How to Layer Vinyl in Cricut Design Space
  • How to Cut Vinyl on Cricut
  • Tips for Layering to Get Perfect Layers
  • How to Seal Vinyl
    • How to Apply the Sealant
  • More Helpful Cricut Posts

MASTER VINYL CRAFTS WITH THIS E-BOOK

Get my ebook The Ultimate Life-Saver Vinyl Guide for Beginners with tips and secrets for weeding, and working with small letters.

DISCLAIMER: Cut N Make Crafts is a participant in the Amazon Services LLC Associates Program, an affiliate advertising program designed to provide a means for sites to earn advertising fees by advertising and linking to Amazon.com.

DIY Layered Jar Labels with Cricut

Supplies Needed

For this project you will need the following supplies:

  • Cricut Maker/Cricut Explore
  • Light Grip Cutting Mat
  • Essential Tools Set
  • Adhesive Vinyl (I used Oracal 651 and Cricut Premium Vinyl) If you’re not sure what type of vinyl to use, check out my post Different Types of Vinyl and How to Use Them
  • Modpodge (Dishwasher safe)
  • Free SVG file (you can grab this by signing up for the VIP list below).

How to Layer Vinyl in Cricut Design Space

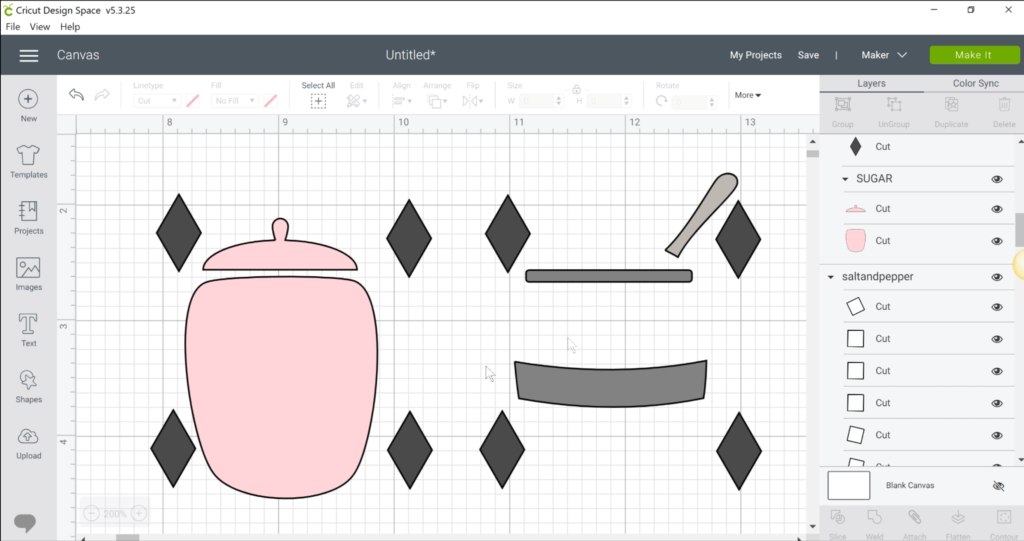
To layer vinyl perfectly, we need to create registration marks before we start cutting. The registration marks help in aligning one layer on top of the other layer perfectly.

To create registration marks, all you need to do is, create multiple copies of your artwork depending on the number of layers your artwork has. Next, add four diamonds, one on each corner of the artwork as shown below. We’re using diamonds here because it has multiple points which make aligning the vinyl 10x easier.

Once you’ve added the registration marks on all 4 corners, select all and attach everything so that it doesn’t move around when we move to the mat.

How to Cut Vinyl on Cricut

Once your artwork is ready, it’s now time to cut the vinyl. If you’re using Cricut vinyl, just turn the dial to vinyl on your Cricut Explore Machine, load the mat and cut it out.

However, if you’re using the Cricut Maker, select the vinyl from the materials settings.

Place the vinyl right side up onto the mat, load the mat and get it cut. Cut out all the different pieces of the artwork.

Tips for Layering to Get Perfect Layers

Once the cutting is done, you can start working on the layers. This needs to be done strategically. Here are a couple of things to keep in mind when layering.

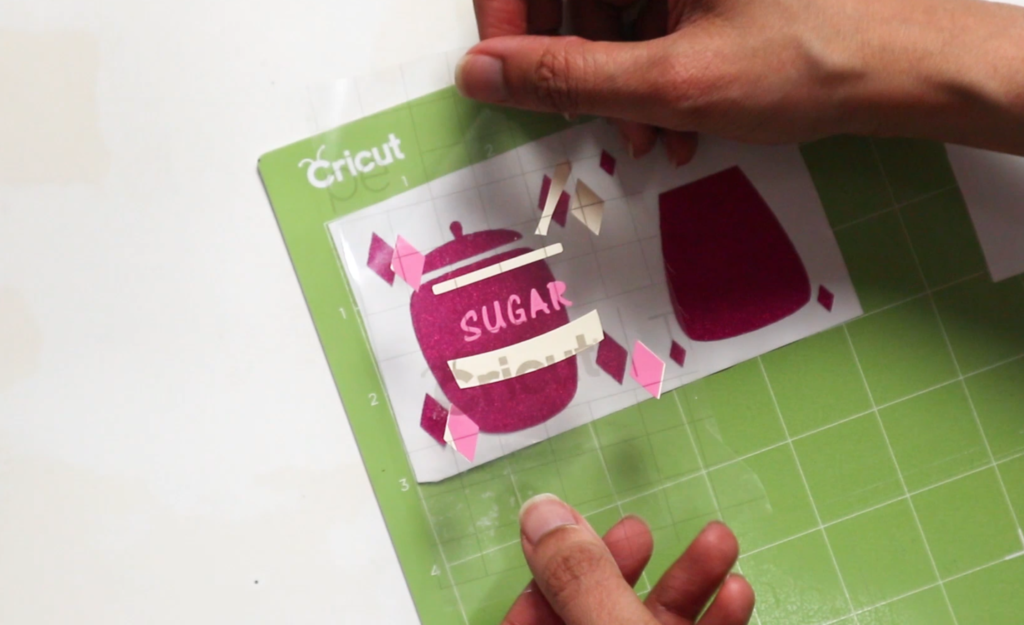
  1. Leave the vinyl stuck to the mat. Weed the vinyl on the mat.
  2. Use a transfer tape larger than the size of the artwork.
  3. Start transferring the topmost layer first. So for this project, the text was my topmost layer so I transferred the text onto the tape first followed by the “spoon and the accent” and lastly the “pot and the lid”.
  4. If you’re using glitter adhesive vinyl, which can be stubborn to work with, flip the vinyl and burnish it from the back.
In this post, you'll learn how to layer vinyl by creating registration marks in Cricut Design Space in 5 simple and easy steps. Also covered in this post: how to make multi-layer vinyl decals and how to assemble a four-layer decal and how to seal vinyl on cups and utensils.

How to Seal Vinyl

If you’re using vinyl for utensils or for outdoors like a car, it’s best to seal the vinyl to make it long-lasting. Sealing will prevent the vinyl from shrinking and peeling off when it comes in contact with water.

There are three different types of sealants that you can use to protect your projects. The type of sealant that you use to seal your vinyl project depends on the type of project.

For utensils that are used regularly, its best to use the dishwasher safe ModPodge or DecoArt Triple Thick as both of these are non-toxic. The only problem with Triple Thick is that it leaves a very thick layer on the project which can actually be felt. 

If using dishwasher safe ModPodge you’d have to wait for 28 days for it to completely dry and form a protective layer. Until then, it’s best to just handwash the mug/utensil. But if you’re in a rush especially if you’re selling custom mugs, I’d suggest going for DecoArt Triple Thick. 

For outdoor projects, the best selant to use is Polycrylic. One thing to keep in mind is to make sure you apply thin coats with intervals as a thick coat might cause the vinyl to curl up.  

PROJECT TYPE SEALANT TO USE
Utensils (mugs/jars) ModPodge/DecoArt Triple Thick
Outdoor Projects Polycrylic

How to Apply the Sealant

To apply, the sealant simply use a paint brush and coat the entire vinyl with the sealant. If you want you can cover the entire surface of the project.

In this post, you'll learn how to layer vinyl by creating registration marks in Cricut Design Space in 5 simple and easy steps. Also covered in this post: how to make multi-layer vinyl decals and how to assemble a four-layer decal and how to seal vinyl on cups and utensils.

More Helpful Cricut Posts

With that, we have reached the end of this post. Please share this tutorial on how to apply layered vinyl with your Cricut buddies. Also, check out these helpful Cricut posts.

  1. 9+ AMAZING Craft Paper Storage Ideas
  2. DIY Car Ornament-Cricut Maker Wood Project
  3. 5 Epic Reasons to Create Your Own SVGs

Related Posts:

  • How to find uploaded files in Cricut Design Space using filters
    How to find uploaded files in Cricut Design Space using…
  • How to Resize an Image in Cricut Design Space
    How to Resize an Image in Cricut Design Space
  • How to delete uploaded images in Cricut design space
    How to delete uploaded images in Cricut design space
  • DIY Vinyl Mug Cricut Gift for Teachers
    DIY Vinyl Mug Cricut Gift for Teachers

Filed Under: Home Decor Tagged With: Cricut Vinyl Projects

Previous Post: « 9+ AMAZING Craft Paper Storage Ideas
Next Post: How to Make Rolled Paper Flowers and Vinyl Decal Canvas Art »

Reader Interactions

Trackbacks

  1. DIY Vinyl Mug Cricut Gift for Teachers - Cricut Maker Crafts says:
    June 4, 2020 at 1:45 am

    […] vinyl project depends on the type of project. To read more about sealing vinyl, check out my post How to Layer Vinyl in Cricut Design Space. At the end of this post, I share the details on using the right type of sealant to seal vinyl […]

Primary Sidebar

Recent Posts

  • Get Free SVGs – Creative Fabrica
  • Mother’s Day Sublimation Designs for T-shirts
  • DIY Penguin Mug Holiday Decor
  • EASY Holiday Cake Topper Tutorial
  • Super Easy Felt Unicorn Ornament SVG + Tutorial

Amazon Affiliates Disclosure

Cut n Make Crafts is a participant in the Amazon Services LLC Associates Program, an affiliate advertising program designed to provide a means for sites to earn advertising fees by advertising and linking to Amazon.com.

Footer

cutnmakecrafts

Jav | SVG Business Coach
💎The SELL DIGITAL CRAFTS - THE SMART WAY SUMMIT 💎The SELL DIGITAL CRAFTS - THE SMART WAY SUMMIT kicks off on Monday!

This free event features 15+ speakers who are ready to teach you how to make passive income from crafts. Who doesn’t want that?
You’re going to hear from all kinds of experts like:

-😍 Nadalie Bardo (Pinterest Coach)
-💗Amira Irfan (A Self Guru)
- ✨Chris Butler (Daily Dose of DIY)

And sooo many more!

We've got topics ranging from
Master Etsy SEO to boost sales
🌟How to 3x your sales with Pinterest
How to be confident in your creativity
How to Leverage Etsy Trends to Achieve More Sales
How to Price, Package, and Sell Your Digital Goods.

Let me know which presentation you’re most excited about in the comments and, if you haven’t yet, check out the in my bio to learn more and grab your 💗FREE ticket💗!
🚨READ CAPTION🚨Calling all BUSY crafters! Reg 🚨READ CAPTION🚨Calling all BUSY crafters! Registration is officially OPEN for the 😍SELL DIGITAL CRAFTS-THE SMART WAY SUMMIT WOHOO😍!
 
💎This summit was created to help busy crafters like you design and sell digital products to make passive income without adding a TON of extra stuff on your plate.
 
💎We’ve got 15+ incredible speakers with topics ranging from 

🎉 this year we have speakers covering topics like
✅ the legal stuff of selling digital products
✅ sellingKDP templates
✅ hand lettering business
✅ using Tik Tok and reels to boost your business
✅3 things to make a best seller SVG
🔥🔥🔥and soooo much more!
👉 visit selldigitalcrafts.com to get your FREE ticket now!
.

 
🚨The summit kicks off on 🎉APRIL 3rd 🎉 and it’s going to be 3 action-packed days that you won’t want to miss.
 
🎟️Click the link in my bio to learn more and get your free ticket! 
 

.
.
#cricutmademedoit #cricutproject  #cricutmaker #cricut #cricutmade #designisinthedetails #cricutexploreair2 #svgcuttingfiles #svgfiles #svg #svgdesigns #cricutprojectsuccess #cricutteacher #cricutmachine #cricutcrafting #cricuteasypress #cricutcraft #cricutdesignspace #crikutmakercrafts
Ever felt like literally every info and tutorial o Ever felt like literally every info and tutorial out there is about selling and growing handmade businesses with barely any resources on selling crafty digital products for making a passive income?

I’ve seen my fair share of these, and each one left me frustrated and feeling like there was no other way of making money other than selling handmade.

But once I saw the success in my digital business, everything changed!

I know that you tend to struggle with things like:
- selling handmade items when you have such little time on hands
- meeting your monthly income goals while juggling a full-time job and kids
- or maybe you just feel like you’re not creative enough…..

And that's why this free event is just for YOU!
Over 3 days you'll hear from 20+ speakers about everything from
Master Etsy SEO to boost sales
🌟How to 3x your sales with Pinterest
How to be confident in your creativity
How to Leverage Etsy Trends to Achieve More Sales
How to Price, Package, and Sell Your Digital Goods.

And it’s free!
Get your ticket at the link in my bio!
The SELL DIGITAL CRAFTS - THE SMART WAY SUMMIT kic The SELL DIGITAL CRAFTS - THE SMART WAY SUMMIT kicks off next week, to help you with everything from Etsy and Pinterest marketing to finding confidence in your creativity.

👉👉Click the link in my bio to get your FREE ticket!
Load More... Follow on Instagram

Hi, friend! I’m Jav, a research assistant/SVG design coach. I’m here to help you design and sell SVG cut files. Check out my SVG Business Podcast if you want to start your own SVG business!


Cut N Make Crafts Privacy Policy

ARCHIVES

svg business class - how to design and sell SVG cut files

Copyright © 2023 · Sprinkle Pro theme by Restored 316