In this post, you will learn How to Resize an Image in Cricut Design Space so you can resize the image to your needs for creating the perfect Cricut project for yourself and your loved ones.
Why Resize Your Image in Cricut Design Space?
Resizing an image is very important when working on a project.
If the image is too small, it will be difficult for the machine to cut especially if it has a lot of intricate details. Therefore, it’s best to resize the image so it’s neither too small nor too large for the material that you’re planning to use it for.
If you’re working on a multilayered intricate project like the Home Sweet Home FREE LAYERED SVG FILE + 3D Layered Art Tutorial then, it’s extremely important not to reduce the size of the project below 5″. This is because it has a ton of intricate details that will rip off the paper if the size of the project is too small. Therefore I always recommend my customers and readers to resize the image so it fits an a4/letter size paper or a 12×12 cardstock.
Resizing an image is extremely easy as you will see in the tutorial below that is contributed by my guest post contributor Sumyyah from Craft Your Memories.
There are two different ways of resizing an image in Design Space and Sumayyah will show you both of these in this post below.
How to change the size of objects in Cricut Design Space
Instructions
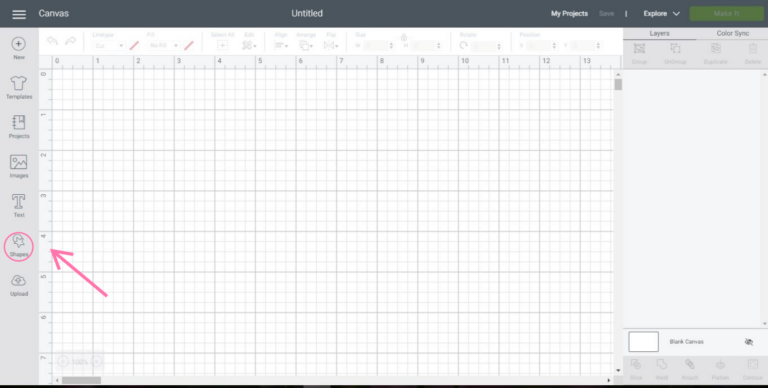
- There are two ways to change the size of an object that has been uploaded onto Cricut Design Space or from the canvas. First start Cricut Design Space and open one of your previous projects or enter a new project if you will be uploading a file or using an image from the canvas. In this example, I will be starting a new project. Once on the canvas, click shapes’ on the left side panel bar
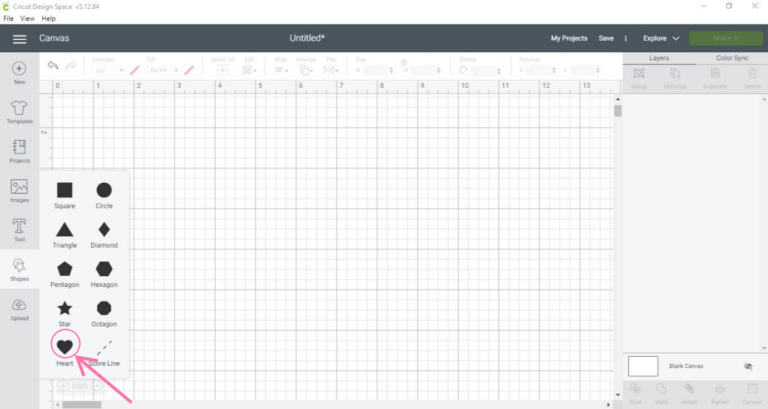
- Select any shape that suits your preference. I will be selecting the heart.
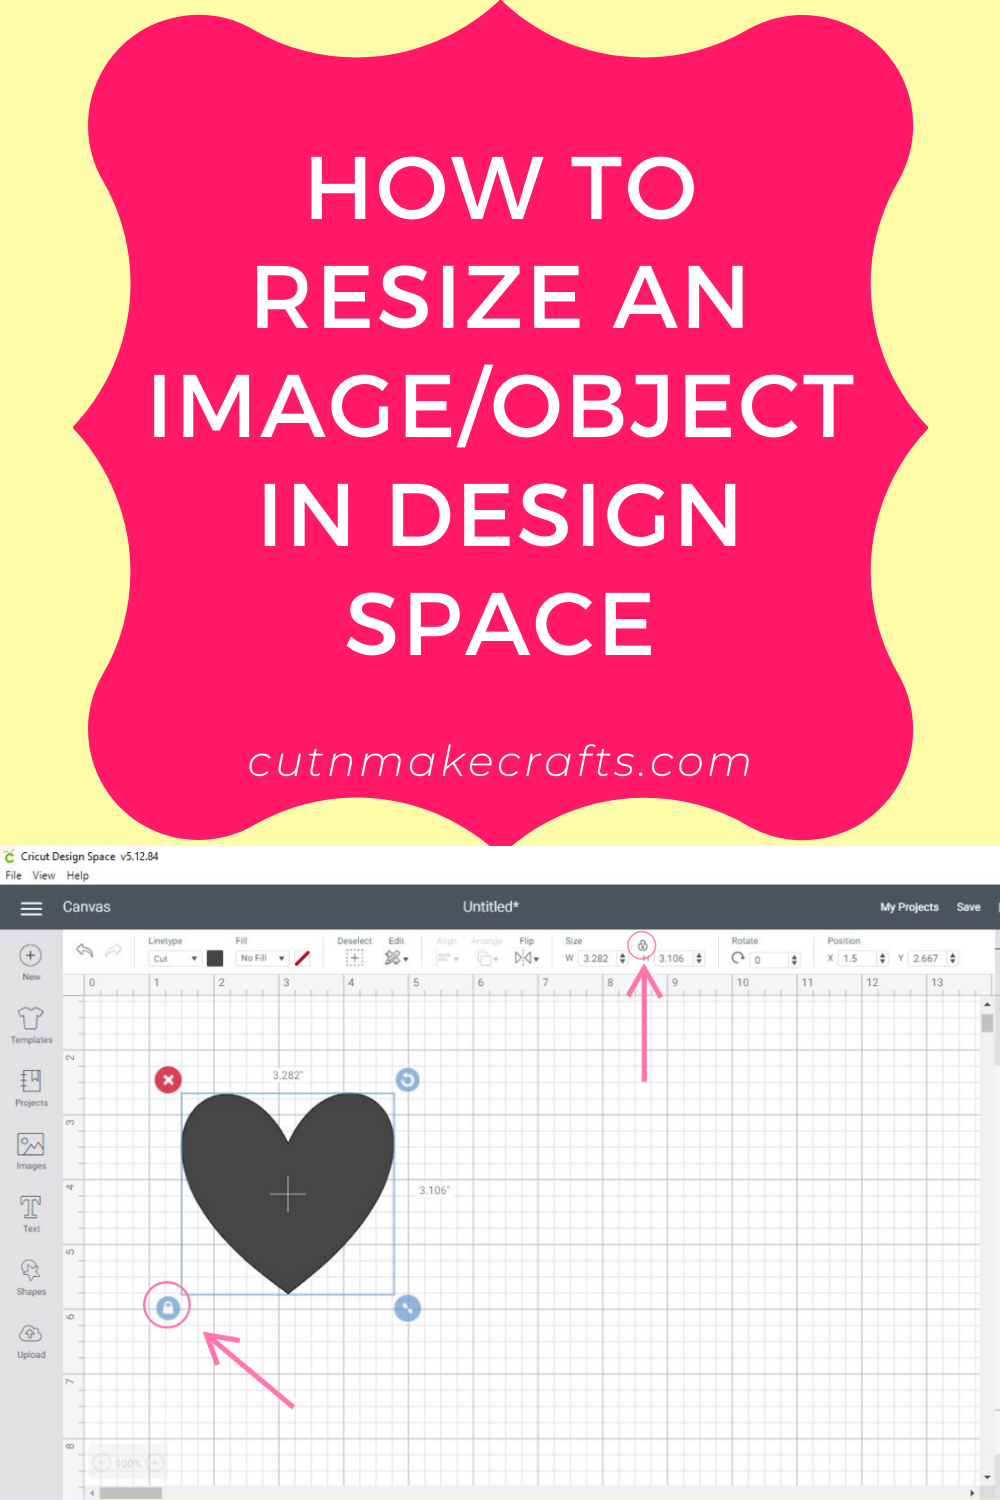
- After the heart has been added to the canvas, it is now time to change the shape. Check if the image is in proportion. This can be checked by viewing the lock at the bottom left corner of the image or in the edit bar near the top.
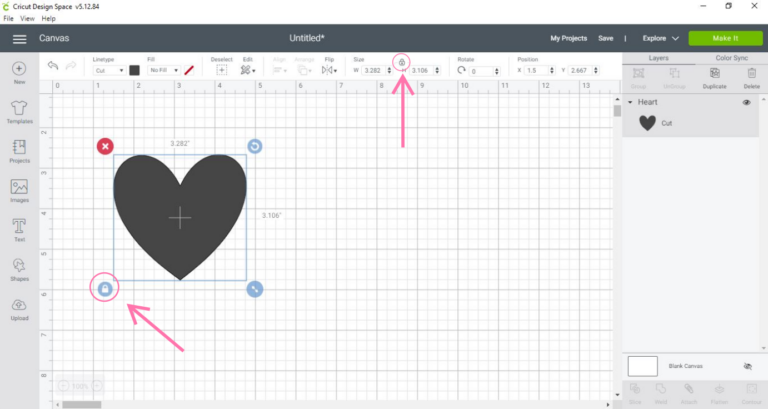
- It is important to check if the lock is present since if it is unlocked the image will not be proportionate once the dimensions change.
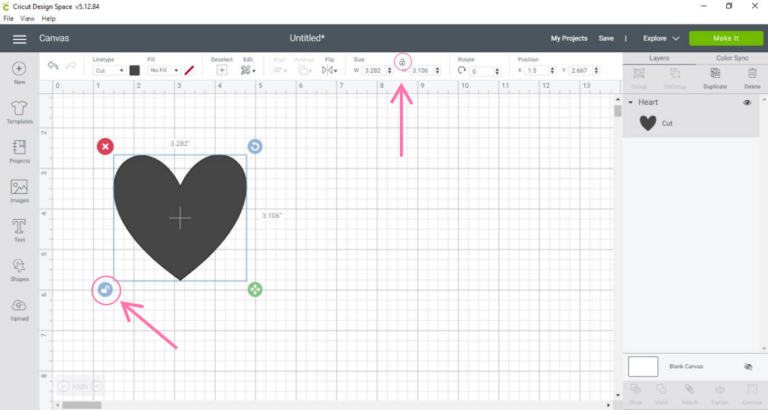
- An important thing to note is of the arrows in the bottom right corner of the image. When locked, a dual arrow will appear, indicating that the image will change in proportion.
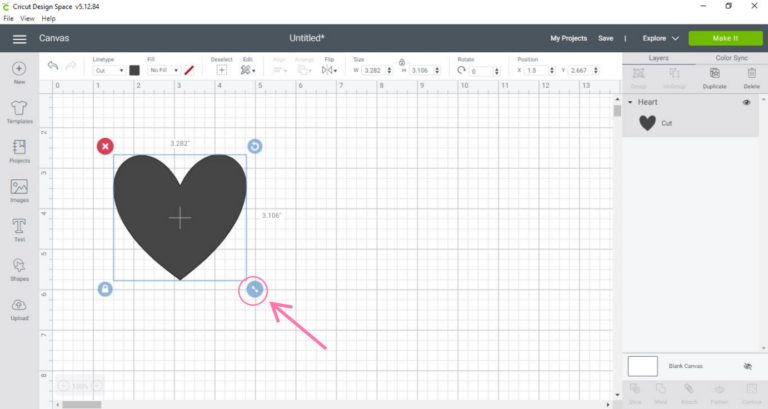
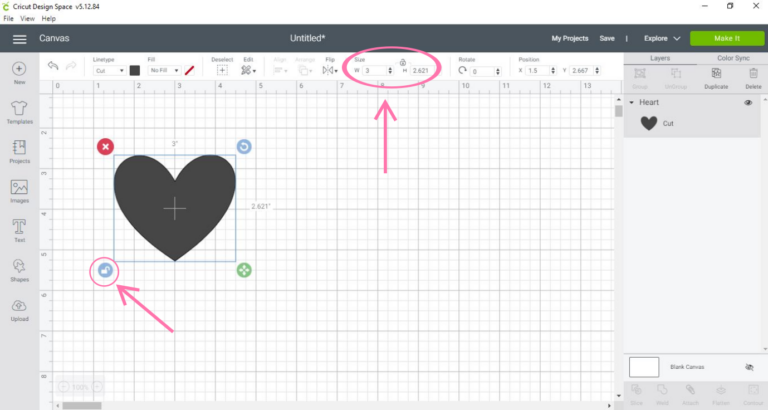
- When unlocked, 4 arrows will be visible, which represents that the image won’t be proportionate if the size changes.
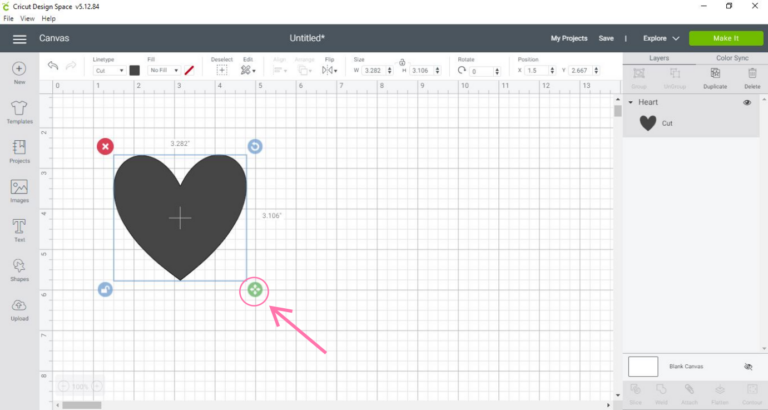
- The first method to changing the size is to drag the arrows. The dimensions can be checked on either side of the image or by viewing the size tab in the edit bar at the top. The current dimensions of the heart are 3.3” W x 3.1” H.
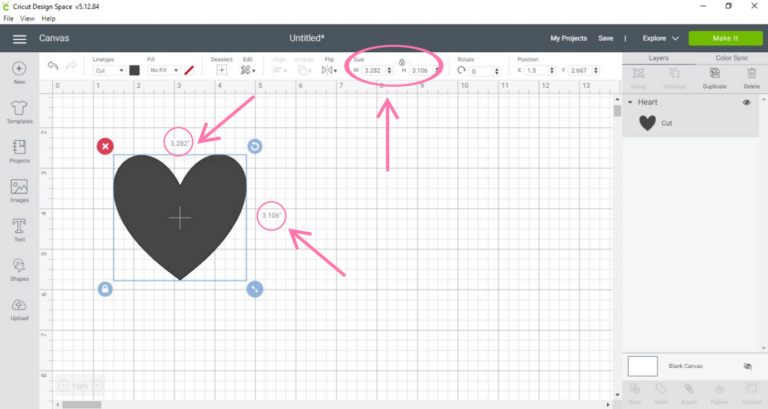
- Drag the arrows to the size of your choice. I am going to make the heart smaller by dragging the arrows. It is now 2.8” W x 2.6” H.
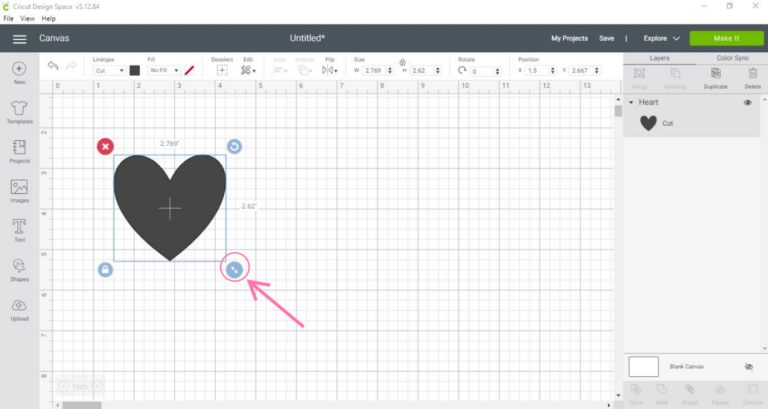
- The second method is to use the size tab in the edit bar. Change the numbers in the width and height according to your preference. This time I am going to unlock the image and change the width of the heart from 2.77” W to 3” W.
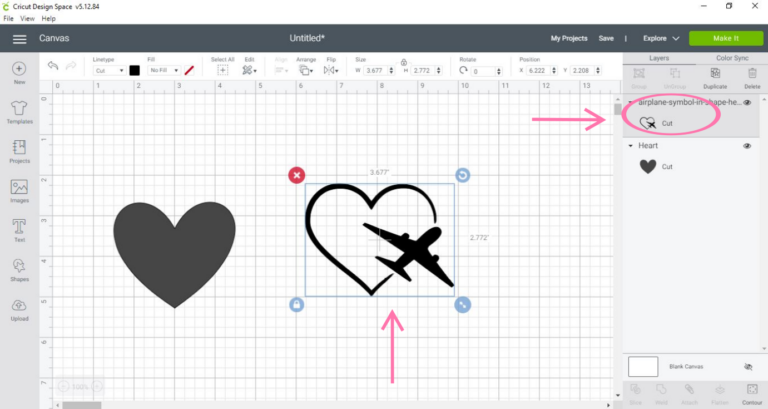
- If you have more than one image on your canvas, select the ones that need to be changed for size by either clicking on the image or tapping on the image in the layers bar. These methods of changing the size can be applied to all images on Cricut Design Space.
Also, check out these Design Space Tutorials under the Cricut Design Space Help section:
- DIY Business Cards in Design Space (So Cute)
- How to create a layered image on Cricut
- Design Space Masterclass

