In this post, you will learn “how to delete uploaded images in Cricut Design Space”. This is a step-by-step tutorial for beginners just starting out with Cricut Design Space.
Hey Cricut buddies! Jav here from Cut n Make Crafts! This is the third tutorial in the Cricut Design Space Help Series where you will learn the steps for deleting uploaded images in Cricut Design Space.
This post is contributed by Sumayyah from Craft Your Memories. Check out the steps for this Design Space tutorial below.
How to delete uploaded images in Cricut Design Space
Instructions
- There are two ways of deleting uploaded images. The first is to start Cricut Design Space and open a new project. Then click ‘upload’.
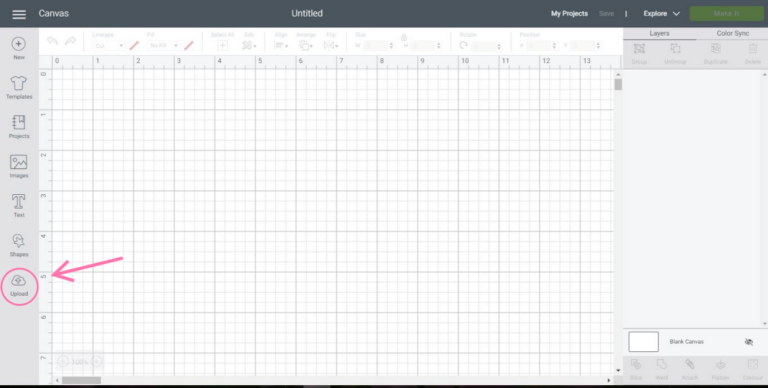
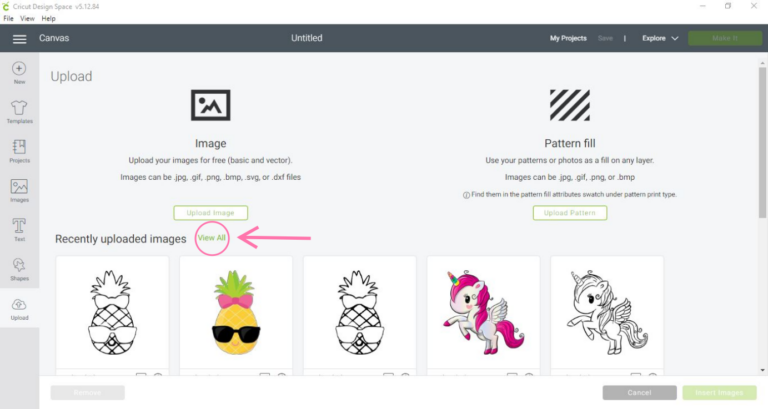
- Once the upload page opens, your most recent uploads will be seen. Click ‘view all’ to access all your uploaded images. This will lead you to the image library.
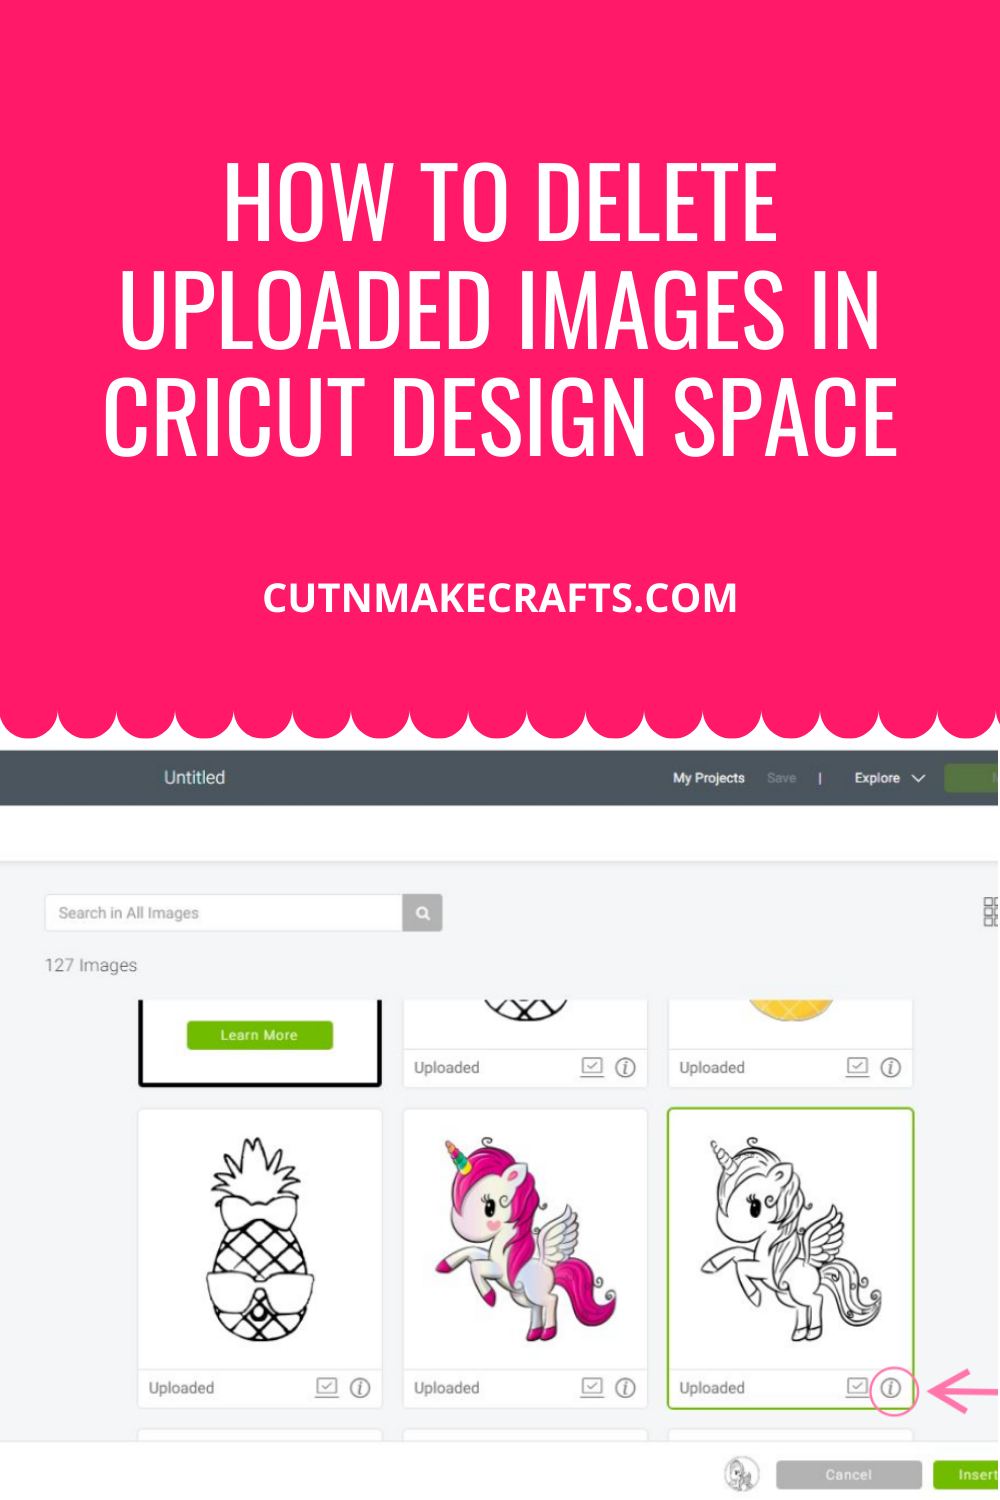
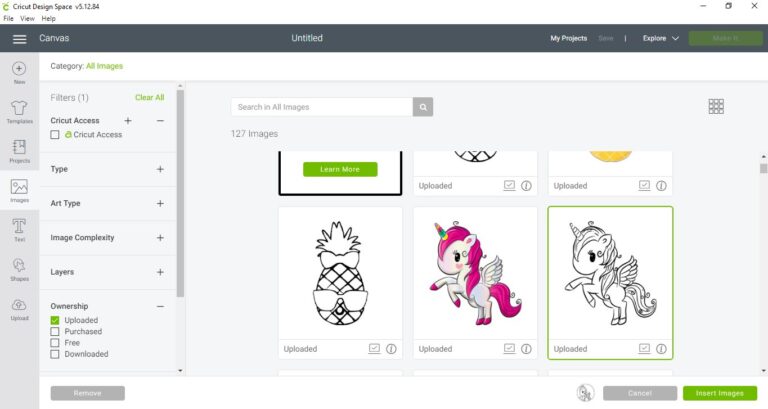
- Select the uploaded image you would like to delete.
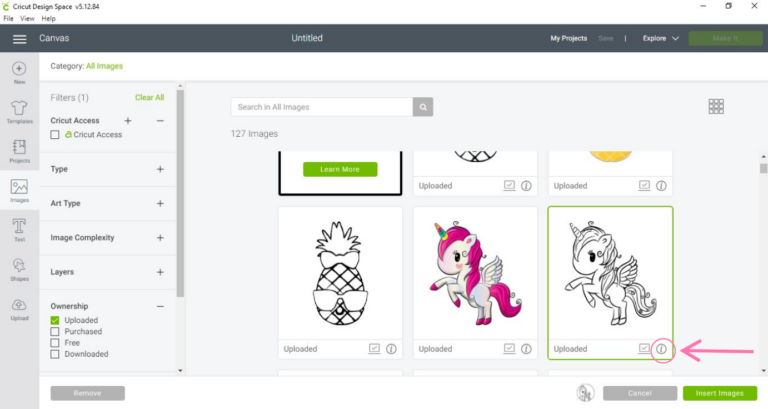
- Click on the ‘i’ located in the lower right corner of the image.
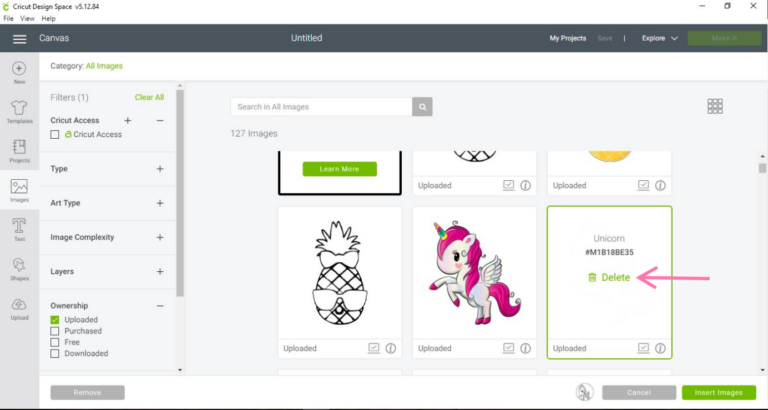
- An option will pop up to delete the image. Press ‘delete’.
- Confirm it by clicking ‘yes’.
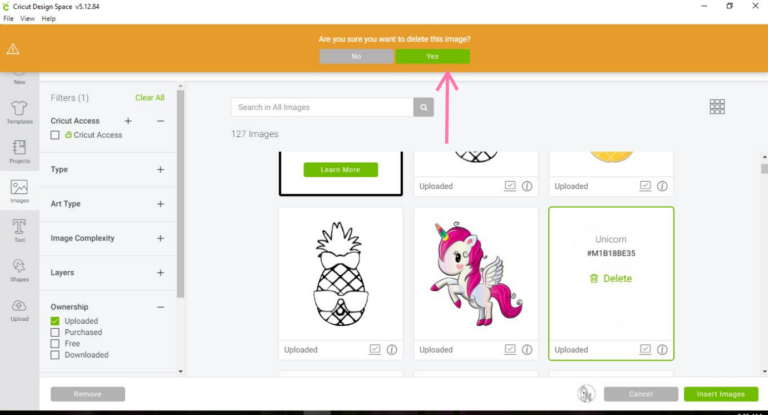
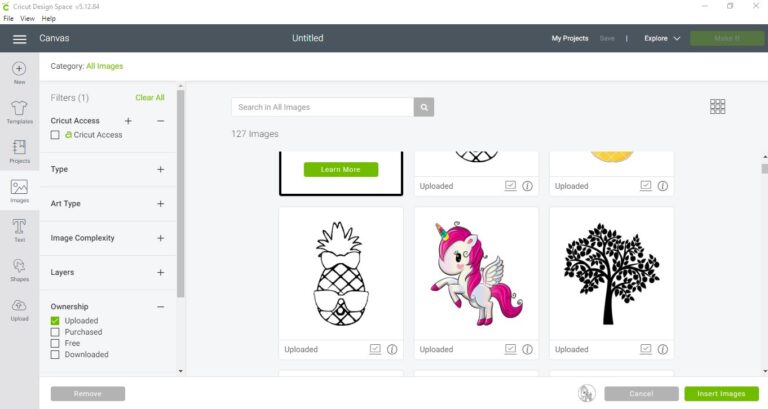
- Your image has now been deleted.
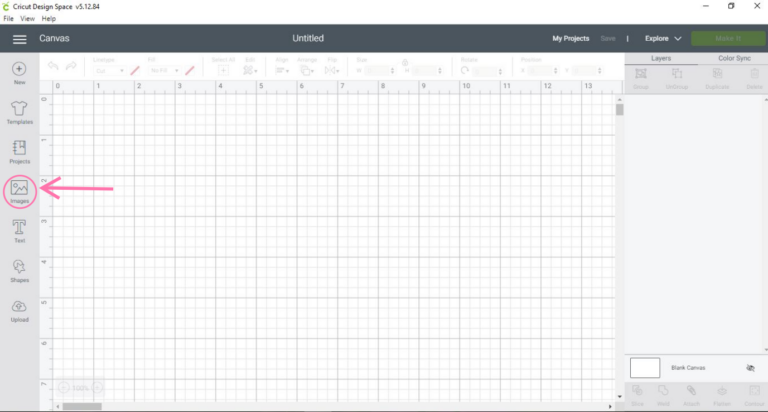
- The second way to delete uploaded images is to go to the canvas and press ‘images’.
- Once the image page pops up, press ‘browse all images’.
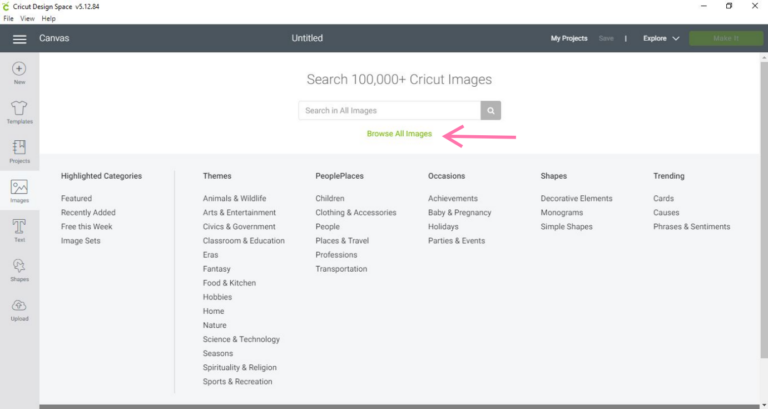
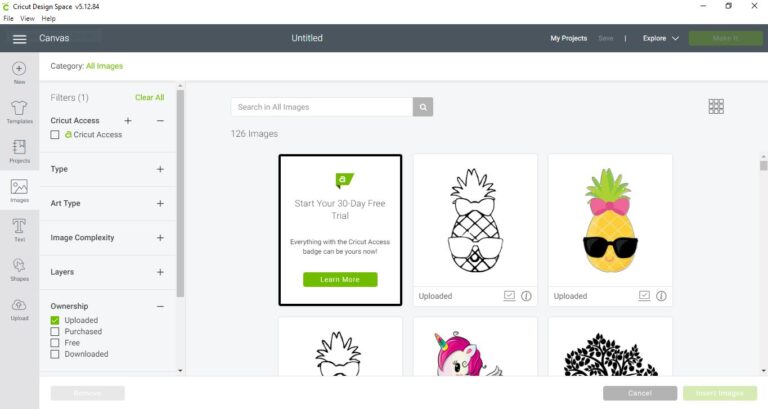
- Many different options will pop up. Under ‘ownership’, select ‘uploaded’ to access your uploaded images.
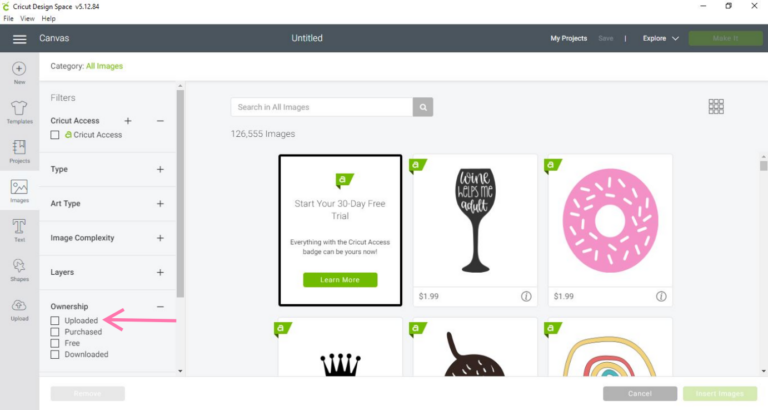
- You will now be able to access your uploaded images. Follow steps 3 – 7 to delete your image.
More Cricut Design Space Posts to Check Out
- How to create a layered image on Cricut
- How to find uploaded files in Cricut Design Space using filters
- DIY Business Cards in Design Space (So Cute)

