In this Design Space Help series article, you will learn how to group and ungroup text in Design Space like a total pro. This is great Design Space tutorial for those who are just starting out with Cricut and want to master text editing in Design Space.
Hello, Cricut buddies! Jav here from Cut N Make Crafts. If you know how to group and ungroup texts you can do a ton of things to add a beautiful touch to your Cricut projects. Ungrouping a text will also allow you to create a shadow/outline behind the text as shown in this tutorial: How to make a border in Cricut design space.
It also allows you to move the individual letters around so you can place them wherever you like and customize your project further.
Grouping and ungrouping text is extremely easy as you will see from the step-by-step tutorial given below.
If you would like to master text editing, check out this tutorial: How to Edit Text in Cricut Design Space Like a Pro
How to group and ungroup words on Cricut Design Space
Instructions
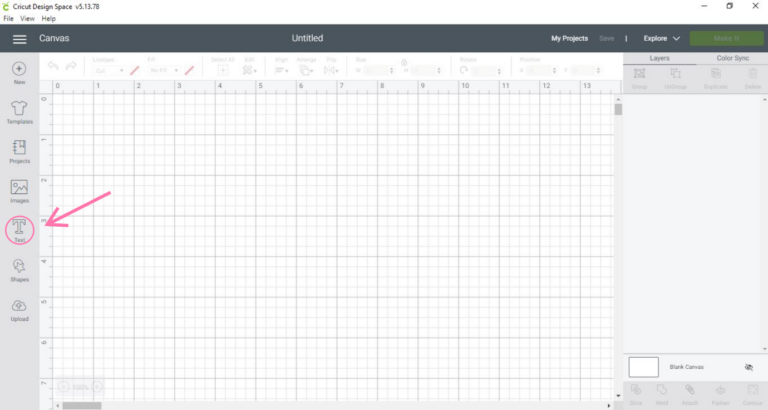
- Open a new project on Cricut Design Space and access your canvas. Once on the canvas, press ‘text’ to add text of your choice.
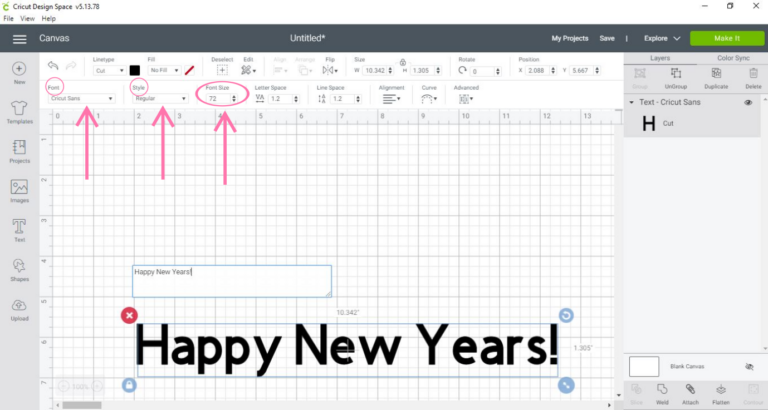
- After writing your text out, choose your font, style, and size.
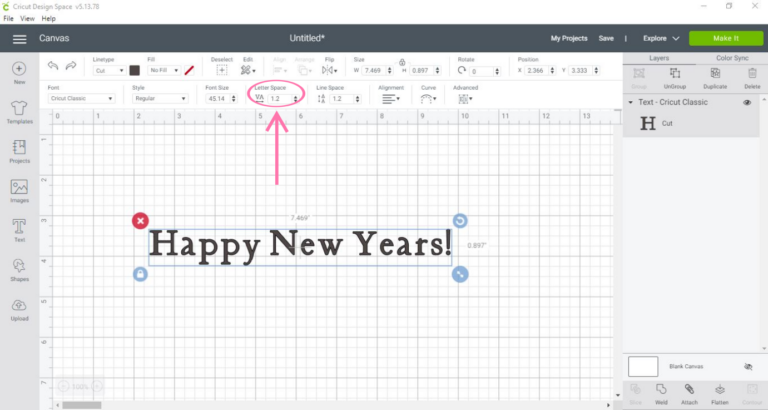
- To decrease spacing between the letters and words, use the ‘letter space’ tool inthe tool bar.
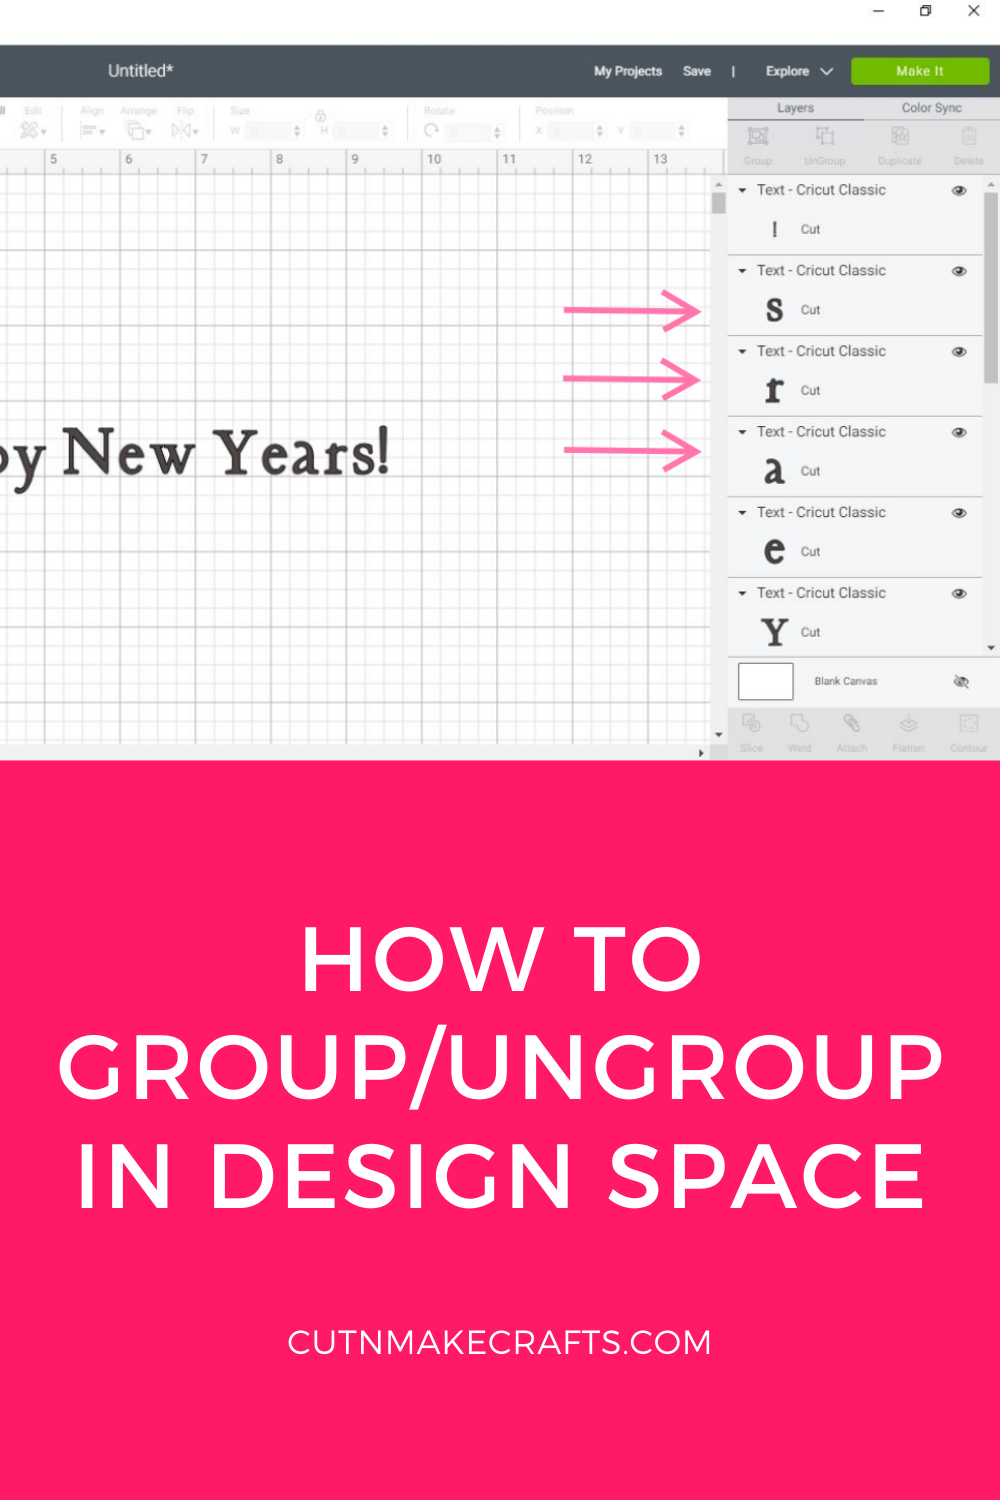
- If there are still noticeable gaps, ungroup the text by pressing ‘ungroup’ in the layers panel.
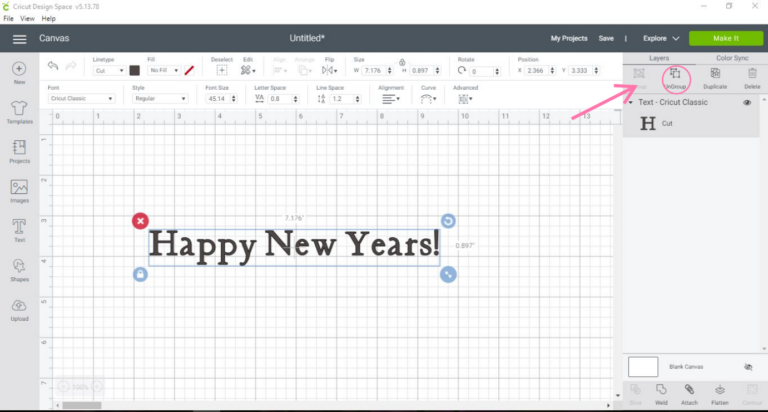
- As you can see in the layers panel, all the letters are now separated from oneanother. You can individually move the letters according to the spacing youprefer.
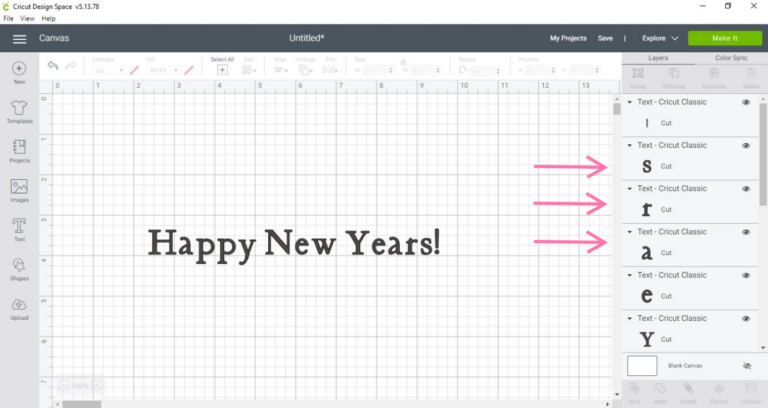
- I would like to decrease the space between the word “new” and “year”. Instead of movingeach individual letter, I will group the words. To do this, highlight over thetext you want to group and press ‘group’ in the layers panel.
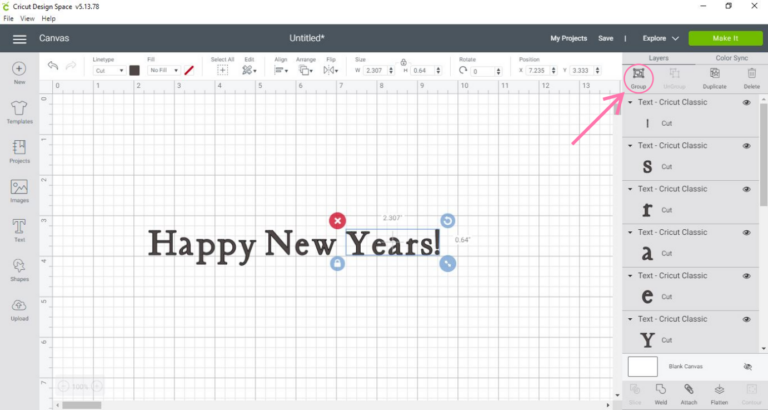
- Dothis step again for the other words. You can also click the letters in thelayers panel instead of highlighting over the letters.
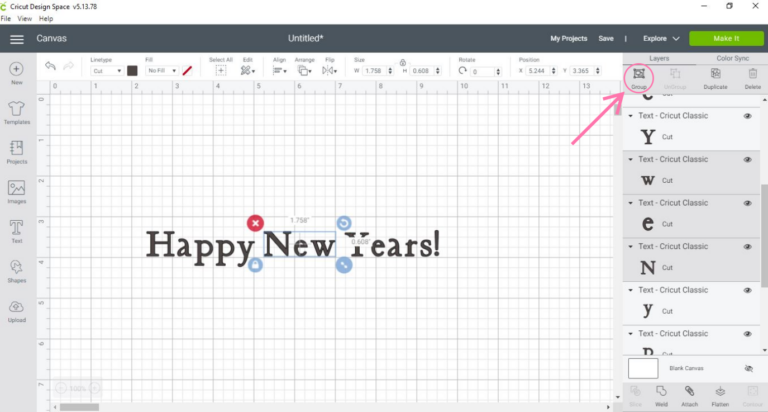
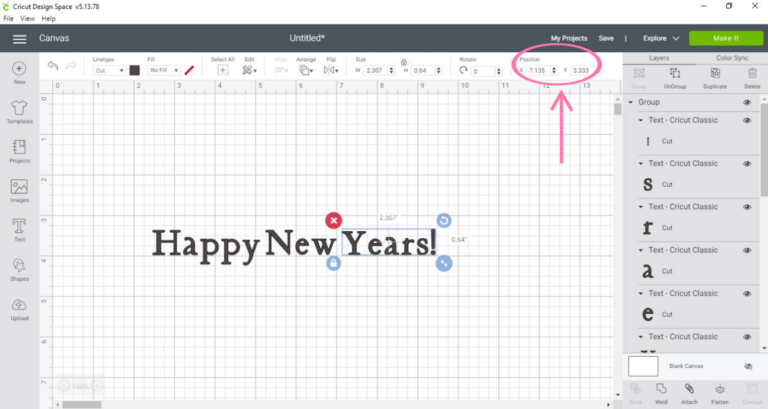
- Once all the words are grouped individually, it is now possible to move the word todecrease the space. This can be done by moving your cursor or arrow keys onyour keyboard, r you can use the ‘X” and ‘Y’ positions on the toolbar to increase or decrease the space.
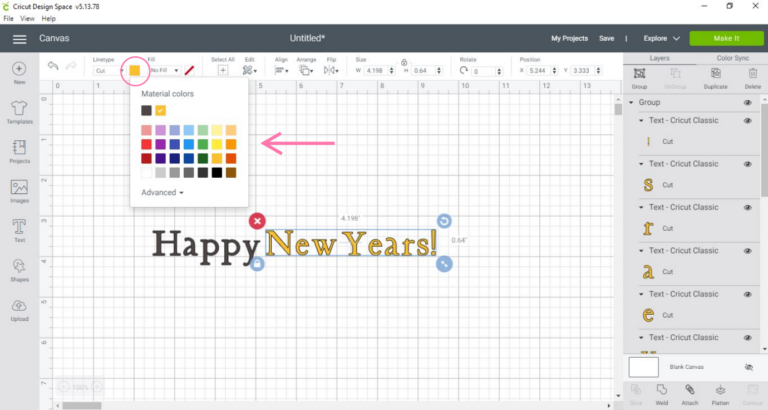
- Thisgroup and ungroup feature can also be used to change the colour of some of thewords. The colour can be changed by accessing the colour panel.
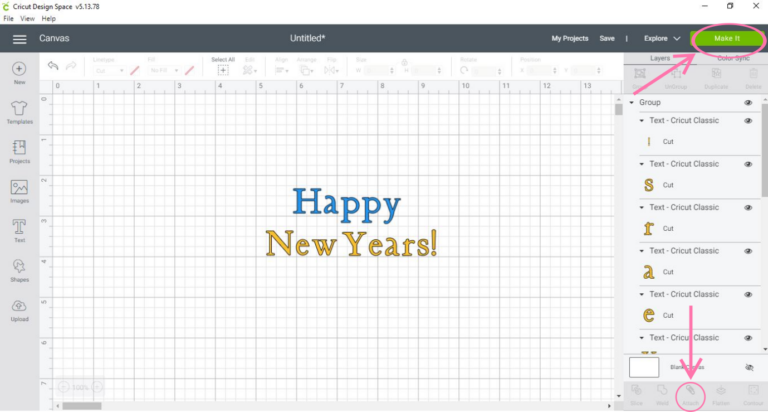
- If you are working with text, it is very important to make sure you press ‘attach’ in order for the text to keep its form when cutting. Press ‘make it’ to see howit would look like without attaching.
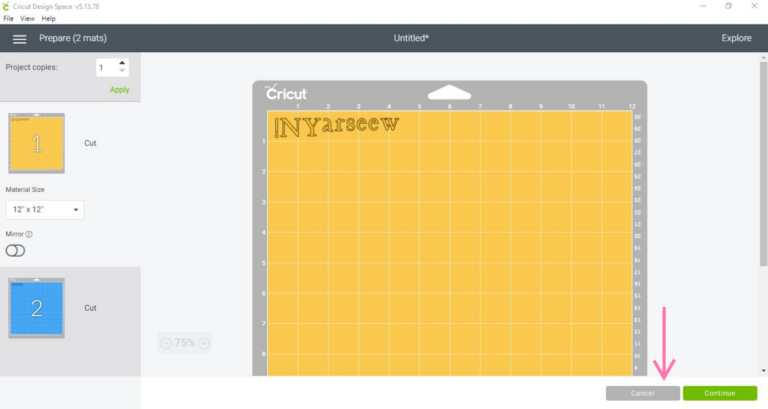
- You will see the letters organized randomly according to colour. This is not whatwe want, so press ‘cancel.
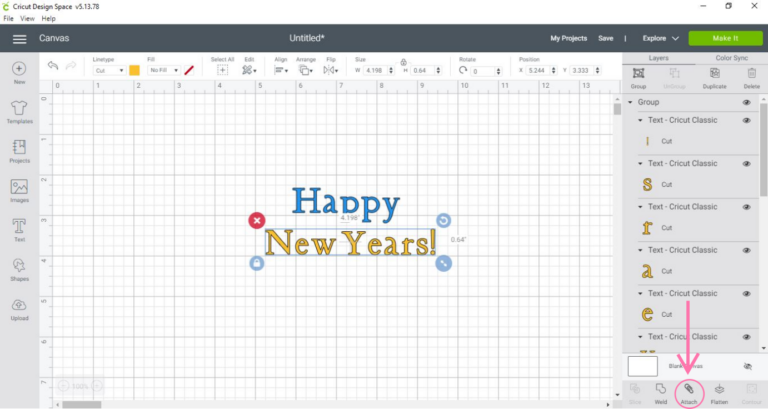
- Accordingto the colours you chose, attach the words to one another. For instance, I willfirst group the yellow words and then attach them together. Then I will selectthe blue word and press ‘attach’. This allows for the words to remain ondifferent mats.
- You can now press ‘group’ to keep the words together. This also allows you toincrease or decrease the size of the text or to move it around the canvas.
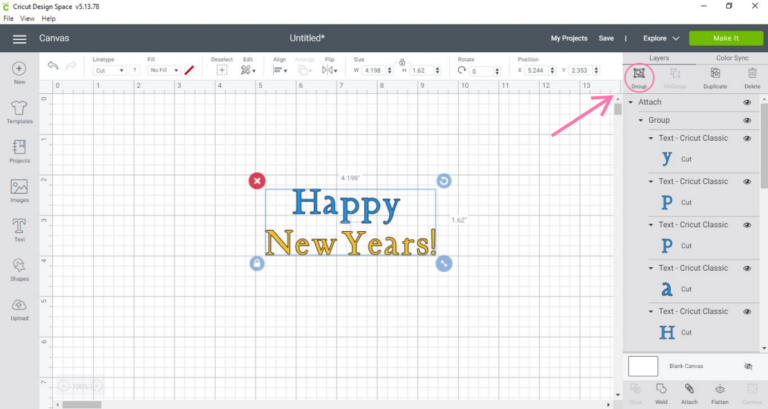
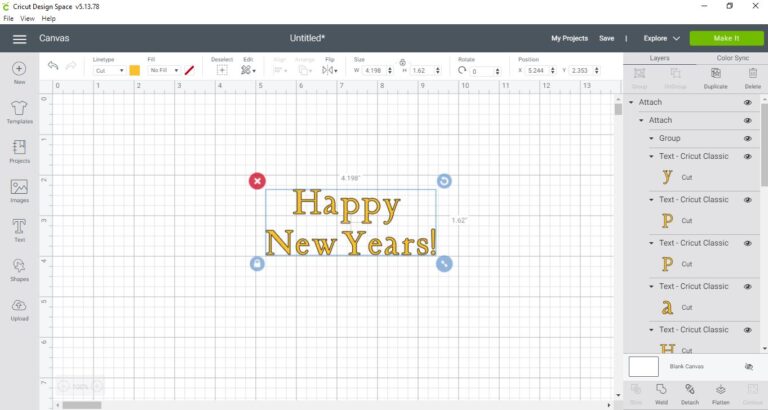
- Ifyou attach all the words together regardless of the colour, then the colourwill become the same.
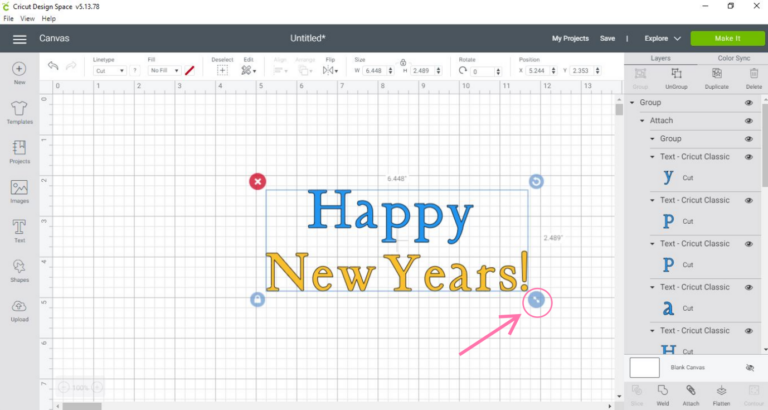
- Anotherway of using the group and ungroup feature is to resize your text as a wholewithout doing it individually. This can be done by moving the dual arrow on thebottom right corner of the text.
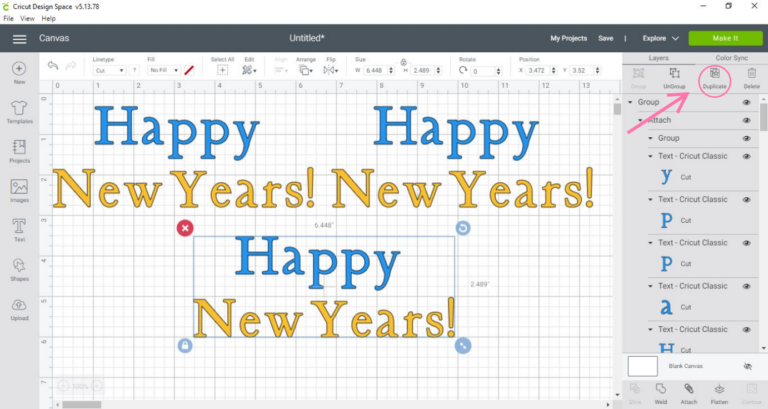
- Also,this feature is useful for duplicating the whole text as many times as youwould like without moving each word by pressing ‘duplicate’.
Video Tutorial: How to Group and Ungroup in Design Space
Master Text Editing in Design Space
More Design Space Help
Also, check out these helpful Design Space tutorials on the blog:
- How to create a layered image on Cricut
- DIY Business Cards in Design Space (So Cute)
- How to make a border in Cricut design space
Pin this image for later

